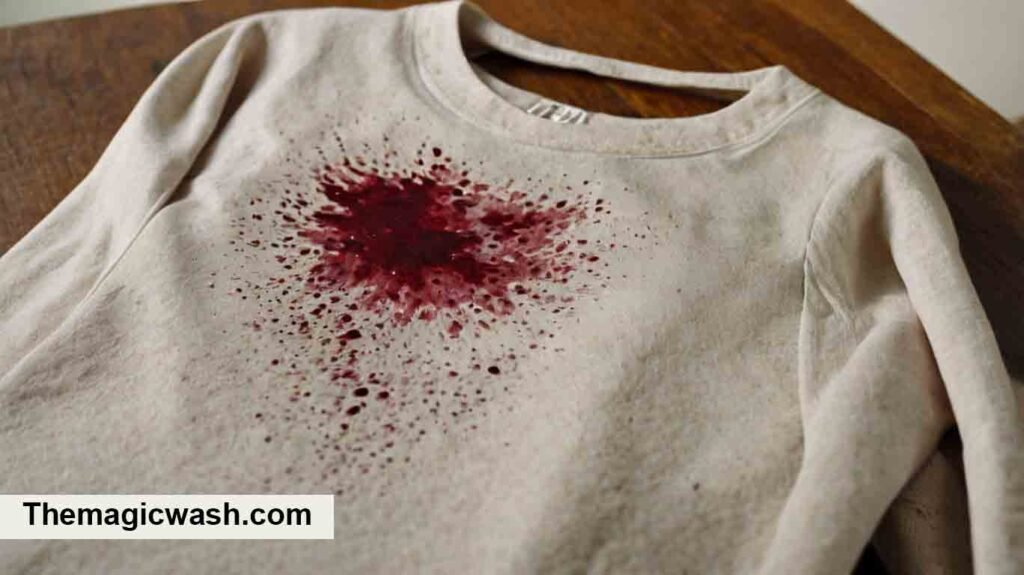
Stain Removal: Stains happen to everyone. They can ruin your favorite clothes or furniture.
Stain removal is an essential skill for maintaining a clean home and wardrobe. From spilled coffee to grass stains, knowing how to tackle these common mishaps can save you time and money. Whether you’re dealing with a stubborn mark on your shirt or a mysterious spot on your carpet, effective stain removal techniques can make a huge difference.
Read More: Washeterias Near Me / Laundromat Tyler TX / Best Laundry Services / Self Service Laundry / Top Rated Washers & Dryers
Read More: vitacures health blog, digital marketing services / cake gallery
Check our shop: Magic Wash Laundromat
We’ll explore practical tips, tried-and-true methods, and everyday solutions to keep your belongings looking their best. By understanding the basics and having the right tools, you can confidently remove stains and keep your items in pristine condition. Dive into our guide and discover how to master the art of stain removal with ease.
Stain Removal top 10 tips
Pre-treatment Steps
Stains can be a real headache, whether they’re from last night’s spaghetti or an unfortunate coffee spill. The key to effective stain removal starts with pre-treatment. This initial step can make all the difference in rescuing your favorite shirt or cherished tablecloth.
Assessing The Stain
Before you jump into action, take a moment to assess the stain. Identify what caused it. Is it grease, ink, or wine? Different stains require different treatments.
Check the fabric type. Delicate fabrics like silk need gentler handling compared to sturdy materials like denim. Also, consider the stain’s age. Fresh stains are easier to treat than older, set-in ones.
Have you ever ruined a shirt by using the wrong treatment? It’s a common mistake but easily avoidable with a little care.
Gathering Supplies
Once you know what you’re dealing with, gather your supplies. Basic items like white vinegar, baking soda, and mild detergent are often all you need.
Keep a small brush handy. An old toothbrush works wonders for scrubbing out stains without damaging the fabric. You might also need some absorbent cloths or paper towels.
Do you have a dedicated stain remover spray? It’s worth investing in one. These can be lifesavers in emergencies.
Now that you’re prepared, you’re ready to tackle that stain with confidence. Remember, the sooner you treat it, the better your chances of complete removal.
Using Baking Soda
Baking soda is a versatile and natural cleaner. It’s great for removing stains from various surfaces. Many people use it for its effectiveness and safety. It doesn’t have harsh chemicals. This makes it a popular choice for households with children and pets.
Preparation
Before you start, gather your materials. You need baking soda, water, and a small bowl. Use a clean cloth or sponge for application. Make sure the stained area is dry. This helps the baking soda work better.
Application Process
Mix baking soda with water. Aim for a paste-like consistency. Apply the paste to the stained area. Use your cloth or sponge to rub it in gently. Let it sit for 15 minutes. This gives the baking soda time to absorb the stain.
After 15 minutes, rinse the area with water. Check if the stain is gone. If needed, repeat the process. For tough stains, you might need to apply the paste more than once.
Always test a small area first. This ensures the baking soda won’t damage the surface. Use this method for fabrics, carpets, and countertops.
Vinegar Solutions
Vinegar solutions effectively remove stains from clothes, carpets, and surfaces. This natural cleaner tackles tough spots with ease.
Vinegar is a versatile household staple that can be a game-changer in your stain removal toolkit. Whether it’s a coffee spill on your favorite shirt or a stubborn wine stain on your carpet, vinegar solutions can help. Let’s dive into the best ways to create and use vinegar solutions effectively.
Mixing Ratios
Getting the right vinegar-to-water ratio is crucial. For general stains, a mixture of one part vinegar to two parts water works well. If the stain is particularly tough, you can use equal parts vinegar and water. For delicate fabrics, dilute the vinegar more. Try one part vinegar to three parts water. Always test the solution on a small, hidden area first to ensure it doesn’t damage the material.
Best Practices
Apply the vinegar solution directly to the stain. Use a clean cloth or sponge to dab, not rub. Rubbing can spread the stain and damage the fabric. Allow the solution to sit for a few minutes. This gives it time to break down the stain. For tougher stains, let it sit longer, but not too long to avoid potential fabric damage. Rinse the treated area with cold water.
This helps to remove both the stain and the vinegar smell. Always launder the fabric as usual after treatment to ensure all residues are removed. Using vinegar for stain removal is simple and effective. Have you tried it on any unusual stains? Share your experiences and tips in the comments!
Hydrogen Peroxide
Hydrogen peroxide is a common household item known for its stain removal properties. It’s a mild antiseptic often used for cleaning wounds. But it also works wonders on various stains.
Safety Tips
Before using hydrogen peroxide, always wear gloves. It can irritate skin. Test it on a small area first. Check for any color changes. Use it in a well-ventilated area. Keep it away from eyes and mouth. Store it in a cool, dark place. Keep it out of reach of children and pets.
Effective Uses
Hydrogen peroxide is great for removing blood stains. Apply directly to the stain. Let it bubble for a few minutes. Then rinse with cold water. It also works on wine stains. Mix it with dish soap in equal parts. Dab the mixture on the stain. Rinse well with water after a few minutes.
For sweat stains, combine hydrogen peroxide with baking soda. Make a paste. Apply to the stain and let it sit for 30 minutes. Wash as usual. It can even help with coffee stains. Blot the stain with a cloth soaked in hydrogen peroxide. Rinse and repeat if needed.
Commercial Stain Removers
Commercial stain removers are a lifesaver when it comes to keeping your clothes and household fabrics looking fresh. They are specially formulated to tackle tough stains that regular detergents can’t handle. But with so many options available, how do you choose the right one?
Choosing The Right Product
When selecting a commercial stain remover, consider the type of stain you’re dealing with. Some products are designed for specific types of stains, like grease, wine, or ink. Reading the label is crucial.
Also, pay attention to the fabric care instructions. Some removers may be too harsh for delicate fabrics. Always test a small, inconspicuous area first.
Consider environmentally friendly options if you’re concerned about chemicals. Many brands offer eco-friendly stain removers that work just as effectively.
Application Methods
Once you’ve chosen the right product, applying it correctly is key. Most stain removers work best when applied directly to the stain as soon as possible. Time is of the essence.
Follow the instructions on the label for the best results. Some products may need to sit for a few minutes, while others work instantly. Patience can make a significant difference.
Using a soft brush or cloth can help work the product into the fabric. Avoid scrubbing too hard, as this can damage the material.
Have you ever tried a commercial stain remover and found it didn’t work as expected? Share your tips and tricks with us in the comments below!
Lemon Juice Techniques
Lemon juice offers an effective way to remove stains from clothes. Simply apply directly to the stain and let it sit. The natural acids in lemon juice help break down tough spots.
Lemon Juice Techniques Lemon juice is a natural, eco-friendly way to tackle stains. Its acidic properties make it effective in breaking down and removing stubborn marks. Plus, it’s something you probably already have in your kitchen.
Natural Bleaching Lemon juice acts as a natural bleaching agent. You can use it to lighten stains on white clothing. Simply squeeze fresh lemon juice directly onto the stained area. Leave it to soak for about 30 minutes. Rinse with cold water and see the difference. For tougher stains, lay the item in the sun while the lemon juice is still on it. Sunlight enhances the bleaching effect.
Combination Methods Combining lemon juice with other natural ingredients can boost its stain-fighting power. Mix lemon juice with baking soda to create a paste. Apply this paste to the stain and gently scrub with a soft brush. Rinse thoroughly and repeat if necessary.
Another effective combination is lemon juice and salt. Sprinkle salt over the stain after applying the lemon juice. Let it sit for a while before washing it off. Have you ever tried lemon juice with vinegar? This duo works wonders on mildew stains.
Mix equal parts of lemon juice and white vinegar. Apply it to the stain and let it sit for a few minutes before rinsing. What’s your favorite lemon juice technique for stain removal? Share your tips in the comments!
Salt As A Stain Fighter
Salt is not just a kitchen staple; it’s also a powerful ally in the battle against stains. Believe it or not, this humble ingredient can tackle a variety of stains, often with better results than commercial products. Whether it’s wine spills or sweat stains, salt has your back.
Types Of Stains
Salt can effectively handle a range of stains:
- Wine Stains: Red wine spilled on your favorite shirt? Salt can help absorb the liquid and prevent a permanent mark.
- Grease Stains: Cooking mishap? Salt can break down the grease and make it easier to clean.
- Blood Stains: Got a cut while shaving? Salt can assist in lifting the blood stain from the fabric.
- Sweat Stains: Those yellow armpit stains on your white shirts? Salt can help remove them.
Application Techniques
Each type of stain may require a different approach:
- Wine Stains: Blot the area with a paper towel. Cover the stain with a generous amount of salt. Let it sit for a few hours to absorb the wine. Rinse with cold water.
- Grease Stains: Sprinkle salt on the stain immediately. Let it sit for a few minutes. Brush off the salt and wash as usual.
- Blood Stains: Soak the fabric in cold, salty water. Let it sit for at least 30 minutes. Rinse and wash the item.
- Sweat Stains: Make a paste with salt and water. Apply it to the stain. Let it sit for an hour before washing.
Ever tried using salt for stain removal? Share your experiences! You might discover new techniques that could benefit others. Don’t underestimate the power of salt; it’s a versatile and eco-friendly stain fighter. Next time you face a stubborn stain, reach for the salt shaker and see the magic unfold.
Club Soda Method
Stains can be a real headache, but the Club Soda Method offers a simple solution. Club soda, a type of carbonated water, has been a trusted stain remover for years. It is easily accessible and budget-friendly. Let’s dive into why this method works and how you can use it effectively.
Why It Works
Club soda’s effectiveness comes from its carbonation and slight acidity. These elements help to lift stains from fabrics. The bubbles in club soda break down and loosen the stain particles. The mild acidity prevents damage to the fabric while cleaning it.
Step-by-step Guide
First, blot the stained area with a clean cloth. Do not rub, as rubbing can spread the stain. Next, pour a small amount of club soda directly onto the stain. Let it sit for a few minutes to allow the carbonation to work.
After a few minutes, gently blot the area again with a clean cloth. Repeat these steps until the stain is gone. For stubborn stains, you may need to repeat the process several times. Finally, rinse the area with cold water and let it air dry.
Using Cornstarch
Have you ever struggled with stubborn stains on your favorite clothes? Cornstarch might be your new best friend. It’s a versatile, natural product that can tackle various types of stains effectively. Let’s dive into how cornstarch can help with oil and grease stains.
Oil And Grease Stains
Oil and grease stains are some of the trickiest to remove. They can quickly ruin your favorite outfit. Thankfully, cornstarch is a simple solution that works wonders.
Imagine you’re at a family barbecue, and oil from the grill splashes onto your new shirt. Instead of panicking, reach for the cornstarch. It’s a lifesaver.
Preparation And Application
First, grab some cornstarch from your pantry. Sprinkle it generously over the stain.
Allow the cornstarch to sit on the stain for at least 15 minutes. This gives it time to absorb the oil and grease.
After the waiting period, brush off the cornstarch with a soft cloth or brush. You’ll be amazed at how much of the stain has lifted.
If the stain persists, repeat the process. Sometimes stubborn stains need a second round of treatment.
Have you ever tried using cornstarch for stain removal? What was your experience? Give it a shot and share your results with us!
Enzyme Cleaners
Enzyme cleaners are a game-changer in the world of stain removal. These powerful solutions use natural enzymes to break down stubborn stains. They are especially effective on organic stains like food, sweat, and blood.
Types Of Enzymes
Different enzyme cleaners target different types of stains. Proteases break down protein-based stains such as blood and eggs. Lipases tackle fat and grease stains from oils or butter. Amylases work on carbohydrate stains like sauces and ice cream. Knowing the type of stain helps you choose the right enzyme cleaner.
Application Tips
Using enzyme cleaners effectively requires a few simple steps. Always read the label to understand the specific instructions. Apply the cleaner directly to the stain and let it sit for about 15-30 minutes. This gives the enzymes time to break down the stain.
In my experience, pre-treating the stain before washing can make a huge difference. For instance, I once spilled tomato sauce on my favorite shirt. An enzyme cleaner specifically for carbohydrate stains saved it. You might find similar success with your stubborn stains too.
Have you ever struggled with a particular stain? Next time, consider an enzyme cleaner. It could be the simple solution you’ve been looking for.
Conclusion
Removing stains doesn’t have to be difficult. With these tips, you can tackle any stain. Regular household items can work wonders. Always act quickly for the best results. Practice makes perfect in stain removal. Keep experimenting with different methods. Soon, you’ll become confident in removing stains.
Happy cleaning!


